
OK, so this will be a quick and short post, just to
let you know how this went and where to find more info!
With two family reunions and a mini vacation in the middle, we were going to
be in the southern part of New Mexico, pretty much outdoors and/or camping,
in July (100 degrees + kind of weather). I have 5
kiddos ages 2-11, and didn’t want our vacation marred by miserable sunburns (and away
from home). I thought I could pick up zinc oxide at one of the natural grocery
stores in town, but found NO ONE carried zinc oxide, and I would have to order
it. Huge bummer, because I waited too
long to make it, and didn’t have time to have it shipped and get it before we
left :0( I posted on my Facebook for
any local friends that may have some, and found someone on our travel route
that was super generous to let me pick some up (shout out to Cathy, you’re
awesome!!!).
So, here is the skinny on what I did.
I didn’t have a scale on me while traveling, lol, so I used a rough
estimate on measurements and compared quantities with a few other recipes.
1/8 c (1/2 oz) beeswax
1/4 c (2 oz) shea butter
1/4 c (2 oz) coconut oil
2 Tbsp (1 oz) zinc oxide powder, NON NANO
1/2 tsp vitamin E oil
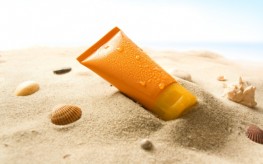
Melt the beeswax, shea butter, and coconut oil in a double boiler (I just used a glass bowl on top of a pan). After it is melted completely, add the zinc oxide and vitamin E oil. Stir until dissolved and mixed thoroughly. Transfer to another container for storage. (Glass won't be a great option if you are going pool side. I considered reusing an empty plastic sunscreen tube, but as it was last minute, I ended up reusing another container instead.)
I wanted to make this sunscreen and bug repellent all in one, so I added essential oils, but right after I did this, I decided it was really dumb, because I didn't want to put it on the kids faces so it wouldn't get in their eyes, argh :-\
(we ended up using it everywhere except on their faces). Guess I will be trying a spray on bug repellent next! (BTW, the essential oils I used were lavender, clove, eucalyptus, rosemary, and lemongrass. I find citronella is one of the most referenced, but 1. I can't stand the smell and 2. I didn't bring it anyways)
My DIY sunscreen worked GREAT, but you definitely need to REAPPLY OFTEN. All of my research and reading has said that as well, so this may not be a great option for everyone. I personally think we need more exposure to vitamin D than what is recommended, so we rarely if ever use sunscreen at our house, but ALL DAY outdoors activities is another matter all together!
This page was a very informative (and fascinating) read with info about SPF. A few important tidbits I learned there:
* Adding twice the zinc doesn't make it twice as effective. (SPF of 15 always seemed low to me, but I found it blocks 93% of UVB rays. Going higher in SPF is NOT proportional to the amount of zinc added, doubling to an SPF 30 only gives you another 4% of protection).
* Being skimpy in your sunscreen application can really kill the effectiveness since it doesn't just decrease by the amount you skip, it decreases by the square root - a 1/2 application of SPF 30 will yield an SPF of 5.5!!
* It is recommended you use 1 oz of SPF 15 for full body coverage every 2 hours.
Here is the other page I found most helpful in my research, PLUS you can purchase homemade sunscreen in her shop for those who don't (want to/have the supplies/have the time) to make it yourself! My out of pocket expenses for this were just for the zinc oxide, as I had everything else already on hand from several projects, but primarily from making lotion bars a few years ago (which I LOVE and will have to post about!)
Well, hope this was helpful and saves you some time and research.
Enjoy your time in the sun!!


